Toyota LandCruiser 75/76/78 Series Barn Door Table
Installation guide

Introduction

Designed specifically for the LandCruiser 76 series / Troopy barn door, this fold down table adds valuable and easy to access work space to your vehicle for those road side pit stops or camping trips.

Our unique table design also provides multi-purpose functionality and can be used with a flat or lipped work surface to prevent items from rolling off. It can also be stowed such that flat items (e.g. a utensil pouch or chopping board) can be stored inside the table out of sight.

This kit comes with all the fasteners required for installation on your LandCruiser 70 series or Troop carrier. An M5 nustert tool is required for installation and 4 clearance holes will also need to be drilled into your door for fitment.

What's in the box?

Product Dimensions & Compatibility

76 Series LandCruiser
78 Series LandCruiser*

*Note: This table cannot be used with the later model Troop carriers stock speaker arrangement which has a speaker on the barn door. Re-locating of the speaker is required.

STEPS

1: Removing the Rear door card

The first step in the installation process is to remove the stock door card. This is easily achieved by getting under the corner of the door card and gently pulling out to release the plastic retaining clips which hold it in place. Once the first clip is out, work your way around the panel until all 10 clips are released and the door card is free.

2: Inserting the nutserts

Using an M5 nutsert tool, install the provided nutserts* into the 10 holes where the plastic clips previously retained the door card. Depending on the stroke length, some nutsert tools may require that you re-thread the nutsert and compress it into the door multiple times for proper fitment.

Important: Before proceeding please make sure that the nutserts have been properly compressed and are seated securely into the holes. 

*Please refer to your respective tools operating manual for instructions on how to install.

1
2
3
4
5
6
7
8
9
10

3: Drilling the clearance holes

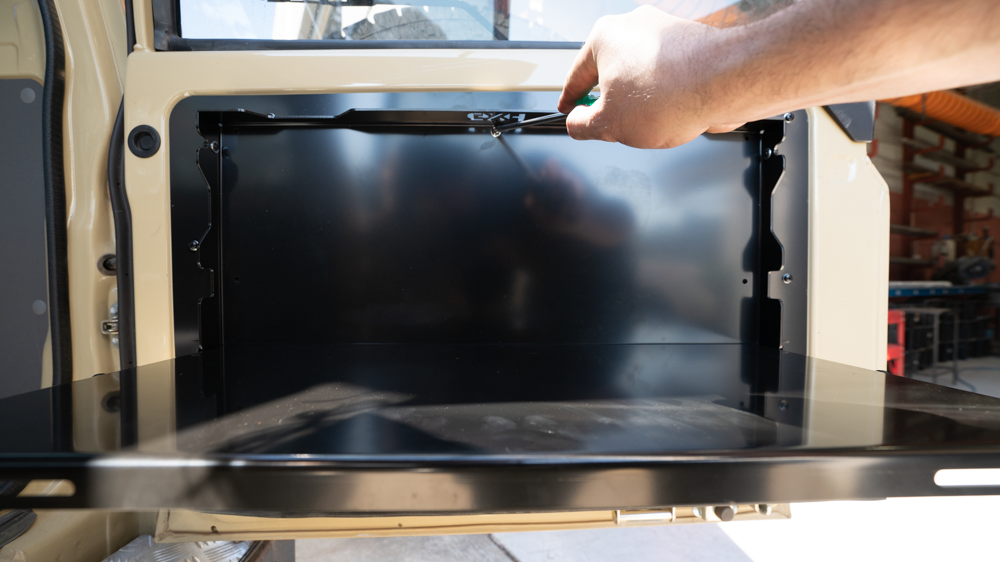
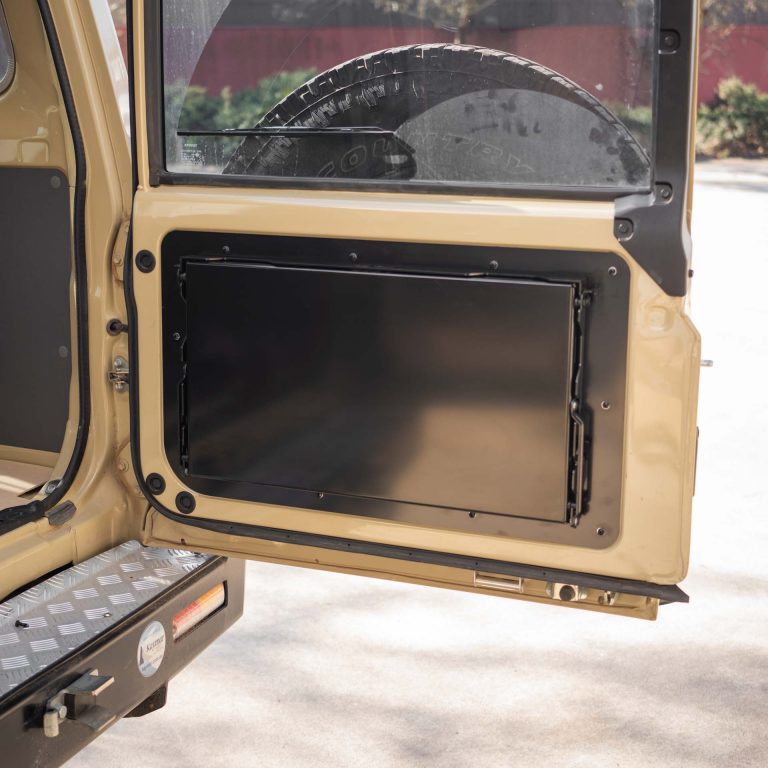
Now that the nutserts have been installed. Align the mounting panel against the door locating it with two of the provided screws. You will see that there are 4 positions where the inner pre-fitted nutserts in the panel interfere with the vehicles door. These are the positions where you will need to drill clearance holes. 


Using a thin marker, spot through and mark where these holes need to be drilled. Next, remove the panel and carefully drill holes in the marked positions. We recommend pulling up the plastic sheeting behind the door prior to drilling to avoid metal swarf being caught on the inside.

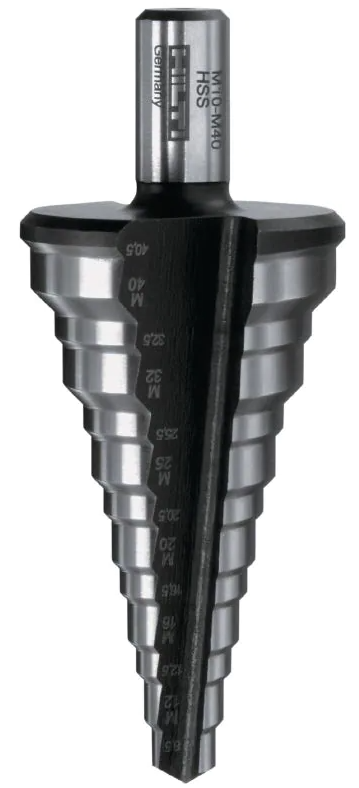
We suggest using a step drill for this step, you can start with a smaller hole and work your way up in size until you have the appropriate clearance. The holes should be approximately 9 mm.

1
2
3
4

4: Fasten the mounting panel

Using the provided M5 x 16 screws and shake proof washers, fasten the mounting panel onto your vehicle making sure every screw is in position before going around and firmly tightening everything down.

5: Fasten the table onto the panel

Using the provided M5 x 16 screws and shake proof washers, fasten the table to the mounting panel. The table will need to be in its open position in order to access all the holes. We recommend getting someone to help hold the table in position for this step.

6: Final inpsection

Finally, go back and make sure that all the screws are secure. Now is also a good time to check the operation of the table and make sure that everything is correct.


For any assistance please contact info@gxh.com.au